Products That Photograph Well for UGC: 5 Easy Wins.
Some products photograph themselves; others fight your phone. Learn to tell which in seconds, plus the 5 easiest products for your UGC portfolio.
The cheapest thing on your shelf usually photographs better than the most expensive. A plain matte coffee bag will out-shoot a sleek chrome travel mug every time, and it has nothing to do with price. It comes down to a handful of traits you can read in about ten seconds, before you take a single frame. The good news hiding in that: the products that photograph beautifully are mostly things you already own.
Most guides just hand you a list. Shoot candles, shoot skincare, shoot food. That works right up until a brand ships you something that isn't on the list, and then you're guessing again. So instead of five products to memorize, this is a ten-second read you can run on anything, the thing in a brand's box or the thing on your bathroom shelf, to call whether it'll photograph itself or fight your phone the whole way.
And one thing worth saying up front, because it stops a lot of people before they start: you never have to be on camera for this. A large share of paid UGC is product photos, your hand at most. No face, no talking, just a phone and an eye for what to point it at.
The 10-second test: does it play with light, or fight it?
Every product sits somewhere on a line between "photographs itself" and "fights your phone." Four quick reads tell you where it lands. None of them need a light meter, an app, or any experience. They're just about how an object behaves in front of a phone camera. The focus here is photos, but the same four reads call how a product will behave on video too.
1. Surface, how it handles light. Picture a short scale: matte, then glossy, then mirror, then clear. Matte, frosted, fabric, paper, wood, and ceramic sit at the easy end. Light lands softly, there's nothing to glare, and the texture (a knit weave, ground coffee, a cream's swirl) is exactly the detail brands love. The hard end is anything glossy: mirror-finish metal, a glassy screen, or clear glass. Those surfaces mirror whatever's around them, the window, the room, and you. Clear glass is its own special case at the far end: it has almost no surface to light, so you light through it rather than at it. Quick read: tilt the thing under a light. Does it glow softly, or throw a bright hotspot and show your reflection?
2. Contrast, does it stand out from your stuff. A cream jar on a white counter, a beige bottle on pale oak, a black gadget on a dark table: each one melts into the background and reads flat, however clean the shot is. A product that separates in tone or color from the surfaces you actually own pops with zero effort. Quick read: picture it on the table you'd really shoot on. Does it stand out, or disappear?
3. Moment, is there a verb you can freeze. A still photo feels alive when it catches a moment: a pour, a swipe, a spray, a lid coming off, the thing being worn. Products that come with a verb hand you that moment for free. A product that just sits there leaves you working much harder to make it look like anything happened. Quick read: is there a verb? Pour, apply, wear, open. If there is, freezing that verb is your strongest single frame.
4. Staging, does it stand alone and read at true size. A palm-sized product that makes sense by itself on a clean surface is easy, you control the whole frame. Something that only works inside a built-out scene, or that's so small or so large a viewer can't tell its size, takes more setup and invites clutter. Quick read: does it work alone on a plain surface, and could someone tell how big it is?
Land on the easy side of all four and you're close to foolproof. One hard read is manageable. Two or more, and you've got a genuine project on your hands, which is completely fine once you know it going in.
Run it once, start to finish
The test is faster done than described. Take the two products from the top of this post.
The matte coffee bag. Surface: matte foil and a paper label, soft light, the grind photographs beautifully, easy. Contrast: a dark bag on a pale counter, easy. Moment: a scoop, a pour into the grinder, easy. Staging: stands alone, palm-sized, easy. Four for four. This one photographs itself, so set it by a window and you're basically done.
The chrome travel mug. Surface: a mirror that shows the whole kitchen and you holding the phone, hard. Contrast: depends on your surface. Moment: a pour, easy. Staging: stands alone, easy. One genuinely hard read, which makes it a project, not a disaster. The test even tells you which move you'll need before you start: control what the metal reflects (the fix is in the hard-products section below).
That's the whole point. The test doesn't just sort products into easy and hard, it points straight at the one thing you'll have to solve.
Score it at a glance
Here's how the five most beginner-friendly categories stack up:
| Category | Surface | Contrast | Moment | Staging |
|---|---|---|---|---|
| Candles & home fragrance | Easy | Easy | Medium | Easy |
| Skincare & beauty (matte/frosted) | Easy | Medium | Easy | Easy |
| Food & beverage | Easy | Easy | Easy | Medium |
| Home & kitchen goods | Easy | Easy | Medium | Medium |
| Stationery & paper goods | Easy | Easy | Medium | Easy |
Run the same four reads on whatever you're holding and you'll know what you're in for before you shoot a frame.
The easy end: five things that photograph themselves
These are the categories you can shoot with confidence today, roughly ordered from most forgiving to slightly trickier. You very likely own at least one already.
1. Candles and home fragrance
A well-made candle in soft daylight is almost impossible to shoot badly. The wax is matte, the vessels have shape and color, and the whole category sits naturally in a home: a windowsill, a stack of books, the edge of a bath. Unlit, it's about as easy as product photography gets. The one catch is the shot brands tend to reorder, the lit candle glowing, because a tiny flame in a bright room asks the camera to do two things at once. Shoot the lit version in a dimmer space so the flame and the warm glow carry the frame, and the candle ends up lighting itself.
Style the shot first, then light the candle, not the other way around. Never leave a lit candle unattended, and keep it well away from fabric or paper props.
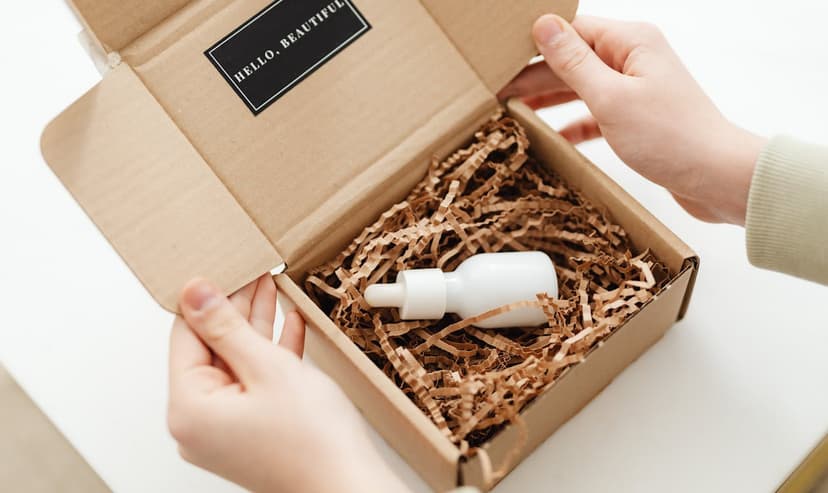
2. Skincare and beauty
Skincare is built to be photogenic. Frosted glass diffuses light, droppers and pumps make interesting shapes, and the textures (a serum's shimmer, a cream's swirl) reward a close-up. It also comes with an obvious moment: a drop forming, a cream being applied, a pump mid-press. For the texture close-up that travels furthest, light it from the side rather than the front, so the surface casts tiny shadows and the detail pops instead of going flat. One thing to watch: glossy bottles and clear glass push this category toward the hard end of the Surface read. If a bottle is throwing glare or showing your reflection, the fixes further down apply.
For droppers, fill the pipette and hold a single bead at the tip without letting it fall. Shoot it in side light so the bead catches a highlight. It's one of the most versatile beauty shots you can make, and brands use it everywhere from ads to product pages.
3. Food and beverage
Food photographs well because it's already doing something. A pour, a drizzle, a chocolate bar snapping, steam off a fresh cup: the moment is the shot, and a colorful product set on a plain board or plate gives you contrast for free. Smartphone food UGC isn't a Michelin shoot, it's appetizing and believable, which is exactly what food brands want. Shoot from overhead or at a 45-degree angle rather than straight on, and work fast so nothing wilts or melts. Staging is the trickier read here, since a bare product often needs a little plating or a prop to make sense. For the niche-specific playbook (lighting, plating, and the sub-niches that turn into repeat work), see the food and beverage UGC tip sheet, and the flat-lay basics help with the overhead shot.
4. Home and kitchen goods
This is where the test earns its keep, because "home and kitchen" is a mixed bag and you have to judge the object, not the category. A matte ceramic mug, a wooden board, a linen napkin, a chunky knit throw: all easy, all forgiving, all probably within arm's reach. The stainless pan or the glass kettle sitting right next to them on the shelf? Hard, for exactly the Surface reasons above. Lean into the matte, wood, ceramic, and fabric pieces and your home becomes the set, with the lived-in, tidy look that reads as authentic rather than staged.
5. Stationery and paper goods
The category nobody lists, and one of the easiest of all. Notebooks, planners, cards, pens, wrapping: flat, matte, completely uninterested in fighting your light, and already on your desk. While other beginners wrestle a polished ring under the lamp, a humble journal photographs itself in one frame. It's also tailor-made for a hands-only, face-free shot, a pen mid-note, a planner being opened, which makes it a quiet favorite for building a portfolio without ever stepping in front of the camera.
A quick aside on a category that breaks the pattern: pets. A product with a willing animal in the frame is some of the most scroll-stopping content there is, and pet brands brief for it constantly. But a live model is an easy product to shoot and a hard one to direct, so it's its own skill rather than a sit-it-by-a-window win. If you've got a cooperative cat or dog, the pet UGC guide covers how to work with them.
The hard end: products that fight your phone (and how to win anyway)
Sooner or later a brand ships you something from the hard side of the reads. None of these are off-limits, they just need a different move. The fixes below are about angle, background, and what you place around the product. Getting the light itself right is its own skill, and phone lighting tips covers that part.
Clear glass and transparent things (perfume, bottles, drinkware)
Glass is the opposite of metal: it has almost no surface of its own, so you light through it, not at it. Backlight (the product between you and the window) makes it read as glass; gentle side light gives it shape. The move that makes or breaks the shot is what you put behind it. A dark card behind a clear bottle draws a clean dark edge down its sides so the shape reads; a bright card turns it into a crisp silhouette. That one card does more than any change to your lighting. Avoid shooting straight toward a window you'll see mirrored in the bottle.
Mirror metal and jewelry (rings, chains, chrome, watches)
This is a pure Surface problem, and the principle is the whole fix: polished metal is a mirror, so it shows whatever you point it at, not light in the abstract. You don't light the metal, you control its reflection. Fill its field of view with a clean white card or sheet of paper so it mirrors smooth white instead of your cluttered room, and tilt the piece or your phone 15 to 45 degrees to break the straight-line glare and lose your own reflection.
For a ring or a watch, hold a sheet of white paper in front of the lens with a small hole cut out for the camera. The metal can only reflect clean white, so it glints instead of picking up you, your phone, and the ceiling.
Glossy screens and dark electronics (phones, gadgets)
Two problems at once. Glare on a screen is just a mirror of a bright source, so slide your phone a few degrees off the straight line between the light and the lens until the bright spot slips away, no need to dim anything. Then there's the dark-on-dark trap: a black device on a dark surface turns to a muddy blob. Shoot black gear on a lighter, mid-tone surface, and turn it so window light catches one edge. That rim of light separates the shape from the background.
Tone-on-tone packaging (white-on-white, black-on-black)
A pure Contrast failure, and the fix is the background, not the product. For a white product on white, let the background go a touch brighter than the product so the product drifts slightly darker and its edges read, it's allowed to sit a hair in shadow. For black on black, add a sliver of rim light along one edge and set it on something lighter. Separation is the entire game.
Apparel and fabric (tees, bags, anything worn)
Clothing is hard for a different reason than glare: it goes shapeless, and a folded blob tells a viewer nothing about size or fit. Steam out the wrinkles, give it shape (a hanger, a fold with some dimension, or on a body), and show it worn or held so the size reads instantly. A wearable seen on a person is the truest way to show it, and that shot doubles as your in-use frame.
Things that won't hold still (tiny, repetitive, or melting)
Supplements and small parts score low on Moment, weak on Contrast, and awkward on size. Create the moment by pouring the capsules into a hand or a dish, add one prop for scale, and set them on a surface a few tones different. Drinks and anything that melts or sweats are a timing problem: stage everything dry first, add the liquid or the ice last, and shoot in a tight window before it wilts. (Genuinely large items like furniture or appliances are a Staging project of their own, they can't sit on a plain surface and demand a whole set, so they're worth leaving until you've got the fundamentals down.)
When a shot still looks off: a 10-second triage
When a photo isn't working, you usually don't need to start over, you need to find which read slipped. Match the symptom to the fix:
| If your shot looks… | The read that slipped | The fix |
|---|---|---|
| Shiny, with hotspots or your reflection | Surface | Re-angle so it mirrors a plain card or wall, not you, or switch to a matte item |
| Flat, like it melts into the table | Contrast | Swap the surface for one a few tones different |
| Like a lifeless catalog scan | Moment | Add the verb: pour it, hold it, wear it, open it |
| Cluttered, or you can't tell the size | Staging | Strip props until the product is clearly the subject, then add one item or a hand for scale |
Shoot it like a brief: the short set that proves you can shoot
Whatever the product, brands tend to reorder the same handful of shots. Cover these five and you've delivered a complete mini-brief from a single setup:
- A clean hero shot. The product on a plain surface in good light.
- An in-use or in-hand shot. Your hand using it, and this is the one that makes it UGC.
- An in-context shot. The product in a believable setting.
- A detail close-up. Texture, finish, the thing words can't carry.
- A scale shot. So size reads at a glance: in hand, worn, or beside a familiar object.
That second shot is worth dwelling on, because it's the line between two things people mix up. A polished product on a white background is product photography. The moment your hand enters the frame using the thing, it becomes UGC, content that looks like a person rather than a catalog. And notice how little of you that takes: one hand, no face, no voiceover. That's an entire lane in a single frame, and the faceless UGC guide lays out the full path.
The scale shot trips up beginners who reach for a ruler. You don't need one. A hand in frame is the best scale cue there is, it shows size, adds the human element, and gives you a moment all at once. A coin, a common object, or the product shown in use work too.
One more reassurance: good light gets you most of the way there, and a small brightness or white-balance nudge afterward is completely normal, not cheating. (For clean color straight out of the camera, phone lighting tips covers it.) Once you've got the frames, how to build a UGC portfolio shows how to arrange them into a set brands actually scan.
Build your first set from what's already home
You don't need to buy anything to begin. Walk through your home running the ten-second test as you go. The bathroom shelf, the kitchen counter, the desk drawer: most homes hold a candle, a skincare product, a snack or a drink, a notebook. Score what you find, pick the three items that photograph themselves, and leave the chrome travel mug for once the fundamentals are second nature.
Then treat each one like a paid assignment and shoot the short set above. A plain corner with good light beats a styled-but-cluttered room every time, you're proving you can shoot, not decorating. One guardrail for anything you'll show publicly: favor unbranded items or your own products, or frame the shot so it showcases your skill rather than implying a brand hired you. The goal is to prove you can shoot, not to claim a client you don't have. Starting from zero, how to become a UGC creator covers the full path.
A varied set that shows range and a clear style is also what gets you found. On a creator marketplace like Modliflex, brands browse creator portfolios and order the work directly, so the photos that prove you can cover a brief are the ones that earn it. When your set is ready, the UGC pricing guide walks through what to charge.
FAQ
What products are easiest to photograph for UGC?
Candles, matte skincare, food, and humble stationery score well on all four reads, forgiving surfaces, decent contrast, a built-in moment, and simple staging, and you almost certainly own at least one. A candle on a windowsill or a notebook on a clean desk can be a portfolio piece this week.
What products are the hardest to photograph?
Clear glass, mirror-finish jewelry, glossy screens, and tone-on-tone packaging are the usual culprits, because the Surface and Contrast reads work against you. They're all shootable with the right angle and background (see the section above), they just take more deliberate setup than a matte candle does.
Do I need a dedicated camera, or is my phone enough?
Your phone is enough. A modern smartphone near a window will beat an expensive camera in a dark room every time, light and product choice matter far more than gear, and the camera is the least important variable in the whole shot. Once you're getting consistent results, a one-dollar white card to bounce light into the shadows is the single best upgrade. For picks at every budget, see the UGC creator toolkit.
How many photos do I need before brands hire me?
Five to eight strong pieces is plenty to start. Aim for variety: at least one clean hero shot, one in-use shot, and one close-up. Brands care about quality and style match, not volume.
Can I photograph products I already own for my portfolio?
Yes. Shooting products you already own for your own portfolio is completely fine, you're demonstrating skill, not claiming a brand deal. Favor unbranded items or your own products for anything public, so the set reads as a showcase rather than an endorsement. Plenty of working creators built their first portfolio entirely from what was already in their home.
Can I do UGC with just photos, without showing my face?
Yes, and a lot of creators work exactly this way. Product photography is a complete UGC lane on its own: no face, no voiceover, your hand at most. Brands order standalone photos constantly for listings, ads, and social. If that's your way in, the faceless UGC guide maps out the niches and formats that suit it.
How much do UGC product photos pay?
It varies widely by brand, scope, and your experience, so treat any single figure as a starting point rather than a rule. Photo sets generally sit below video work, and rates climb as your portfolio and repeat clients grow. The UGC pricing guide walks through the full rate framework.
The best first portfolio isn't shot for a brand. It's shot for practice, from the forgiving things already on your shelf, judged against one ten-second read. Run that read on everything, start with the products that photograph themselves, and you'll have a set worth showing before anyone has hired you.
For Creators
Turn your shelf into your first portfolio
No followers, no experience, no studio. Set your own rates and let brands come to you.
Create your free profile