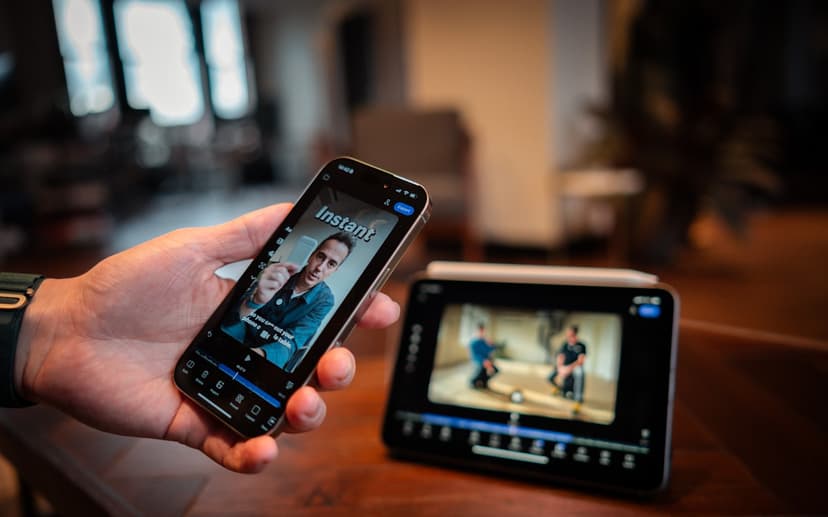
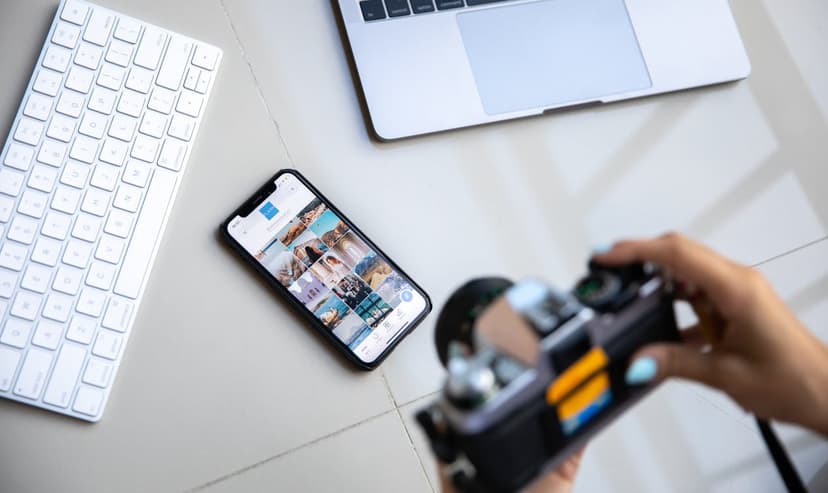
Smartphone Product Photography Tips Brands Will Approve.
Free window-light setups, the color accuracy that stops reshoots, and the phone settings that get your product photos brand-approved.
Two creators shoot the same face cream. One owns this year's flagship phone, the other a hand-me-down that's three years old. The brand approves one set and asks the other to reshoot. The camera isn't what split them. The light was, and whether the white jar in the photo still looked white.
That's the part of product photography nobody selling you gear wants to say out loud: the phone barely matters, and the things that actually decide whether your work gets approved are free. A brand opens your photo and holds it up against the product sitting on their desk. Match the color and keep the light clean, and they upload it as-is and book you again. Let the navy bottle read black or the logo sink into glare, and it comes back, however nice the shot looks on its own.
So we'll go in the order a reviewer's eye actually travels. Light first, because it decides almost everything else. Color next, because that's the line most reshoots cross. Then the backgrounds, settings, and final checks that stop a strong shot from getting bounced on a technicality. Almost none of it costs money. If you're new to shooting UGC for brands, get this down early and you'll skip the amateur-looking stretch most creators get stuck in.
Start with the window you already have
You don't need to buy anything to shoot color-accurate product photos. A window does for free what studios pay to recreate: soft, even, neutral daylight, the kind of light that lets a product look like itself.
The reason a window works is just physics. The bigger and closer a light source is relative to your subject, the softer its light and the gentler its shadows.1 A window is enormous next to a lipstick, so it wraps light around the product. Your phone's flash is tiny and inches away, so it stamps a hard, ugly shadow. Hold onto that one idea, because it explains nearly every choice below.
The setup
Find a window that doesn't get direct sun. A north-facing one is ideal: it gives you steady, diffused light all day. If your only window catches direct sun, tape a sheet of baking parchment over it or hang a sheer white curtain to soften the beam.
Then:
- Set a table beside the window, perpendicular to it, so the light comes from the side rather than head-on or behind.
- Place your product about a foot and a half to two feet from the glass.
- Turn it roughly 45 degrees toward the light.
- Shoot from the opposite side.
That 45-degree angle is where a product gains shape. One side catches the light, the other falls into soft shadow, and a flat object reads as three-dimensional.
Which direction to light from
Direction sets the whole mood of the shot:
- Side light (window to your left or right): depth and texture. Your default for most products.
- Front light (window behind you): flat and even. Good for flat-lays and anything detailed you want read clearly, like a palette of eyeshadow or a gadget covered in buttons.
- Back light (window behind the product): a glow through the subject. Lovely for clear liquids like perfume, serums, and drinks, trickier for solid products.
Time of day matters more than you'd think
- The best windows: mid-morning, roughly 9 to 11, and mid-afternoon, 2 to 4. The room is bright without sun blasting straight through the glass.
- Overcast days are a gift. Clouds turn the whole sky into one soft diffuser: even light, no harsh shadows. Grey weather is your cue to batch-shoot.
- Skip golden hour for products. That warm sunrise and sunset light flatters faces but pushes colors orange. A white sneaker goes cream, a blue serum turns teal, and the reshoot request lands.
- Keep direct midday sun off the setup. It throws dark, hard-edged shadows that no edit fully tames.
Three things to never do with light
A few habits get a shot rejected before color even comes up:
- Don't use the flash. A phone flash is a tiny, harsh light an inch from the lens. It flattens the product, blows out the front, and drops a hard shadow behind it. If the room's too dark to shoot without it, the room is simply too dark: find better light or add a panel.
- Don't let a ceiling light be your main source. Overhead-only light drops shadows straight down, dark and heavy, like the product is being interrogated. Use the window from the side instead.
- Don't shoot into a bright window. Put the product on the sill with the glass behind it and your phone exposes for the sky, turning the product into a silhouette. Keep the window beside you, not behind the subject. (The one exception, a deliberate back-lit glow, is covered above.)
Shape the light for a dollar, then thirty
A single window lights one side of your product beautifully and leaves the other in shadow. Filling that shadow is the highest-value upgrade you can make, and it costs about a dollar.
The foam-board reflector
Grab a white foam board from a dollar store. Cut it in half, tape the halves into a standing V, and set it on the shadow side of the product, opposite the window. The white surface catches window light and bounces it back to fill the shadow. Slide it closer for more fill, pull it back for more drama. Professionals use the identical trick. They just pay for a collapsible disc that costs many times more than a sheet of foam board.
The foil bounce
Wrap a piece of cardboard in aluminum foil, shiny side out, when you want a stronger, more directional bounce than white board gives, say to put a pop of brightness on a logo or a watch face. Foil throws light unevenly and can create hot spots, so keep it a foot or more back and angle it until the reflection smooths out.
The t-shirt diffuser
If direct sun is hitting the product and carving hard shadows, drape a plain white t-shirt or pillowcase over the window. It does the same job as a bought diffusion panel for nothing.
The one piece of gear worth buying
Daylight has a single flaw: it clocks out. If you shoot at night, work in a room with tiny windows, or just want the same result whatever the weather, one small light pays for itself in a booking or two. (For a full gear list across budgets, the UGC creator toolkit has specific picks.)
Two options worth knowing:
- A clip-on ring light (roughly $10 to $15) clamps to your phone and is built for face-to-camera content, not flat product shots. Its source is small and central, so it tends to leave a ring-shaped reflection on anything glossy. Handy for testimonials, weak for products.
- A small LED panel (roughly $20 to $30) is the better buy for products. A compact bi-color panel gives you a wide, even, daylight-balanced source for both photos and video, and the bi-color models let you dial the warmth to match a window. Names like Neewer and Viltrox make panels in this range; treat any specific model as a starting point and check current reviews, since the lineup turns over fast.
To use a panel, set it at 45 degrees to the product and slightly above, about a foot away, then put your foam-board reflector on the opposite side. If the light looks harsh, tape a sheet of printer paper over the front as an instant diffuser. The upgrade move is two cheap panels, one on each side at 45 degrees, a setup plenty of full-time creators run for everything, day or night, for less than a single studio rental.
Color is the line most reshoots cross
This is the part that quietly decides more approvals than anything else, and it's where most creators never go deep. Get it right and you're ahead of most people pitching brands this week.
Color matters more for product work than for almost anything else you'll shoot, because the brand is going to set your photo beside the actual product. If your shot makes their navy bottle look black or their warm-beige foundation read grey, it's useless to them. A buyer who opens the box to a different shade than the photo sends it back, and a brand can't afford content that drives returns. Nail the color and you've handed them a file they can publish untouched, which is exactly what gets you booked again.
Why color drifts
Every light source has a color temperature, measured in Kelvin. Midday daylight sits around 5500K and reads neutral; cloudy light is a little higher and cooler, open shade higher and noticeably blue, and household bulbs are warm and low, around 3200K.2 Your eyes silently correct for all of it, so a white mug looks white to you under any of them. Your phone is not as forgiving: point it at a product under warm kitchen light and the photo comes out yellow; shoot the same thing in open shade and it picks up a blue cast.
Mixing two light sources is the worst case. A window on one side and a warm lamp on the other paints the product cool on one edge and warm on the other, and no single setting corrects both at once.
How to keep color true
- Use one kind of light. Turn off every lamp and overhead when you shoot by a window. One source is the easiest thing in the world for a phone to read correctly, and it's the fix for that two-toned cast.2
- Set white balance instead of trusting auto. Auto white balance guesses, and it guesses worst when your product is a strong color or your background is bright. On Android, open the camera's Pro or Expert mode and set a fixed white balance. The stock iPhone camera doesn't offer one, so shoot in a free app like Halide or Lightroom that does, or shoot RAW and correct it afterward. Lock it once and every frame matches.
- Give it a reference. Drop a plain white card, or a grey card if you have one, into a test frame. If the card photographs yellow or blue on screen, your white balance is off: fix it before you shoot the set, not after.
- Then trust the product, not the photo. Hold the actual item up next to your screen and compare. The rule worth taping above your desk: photograph what's actually there, not what you wish were there. Your brain flatters your own shots. The brand's won't.
One honest caveat about your screen
Most of us only have a phone screen to judge on, and a phone screen is built to look punchy, not accurate. Before you trust it for color, turn off True Tone and Night Shift, which both shift the display's color to match the room or warm it at night,3 and turn off auto-brightness. Even then, treat your screen as good enough to catch obvious drift, not as a perfect proof. If a shot looks slightly off on your phone, it's off.
Get this right and your editing is a crop and a nudge, not a rescue. Get it wrong and you'll spend an hour dragging a yellow jar back toward white, and it'll still read off, because color you never captured isn't there to recover.
A clean white background, built on a table
Plenty of briefs ask for the product on plain white, the look marketplaces and product pages lean on because nothing competes with the item. It reads as simple, and it's the setup most beginners get slightly wrong.
The trick is a sweep: one continuous surface with no seam or corner where the wall meets the table. Tape a sheet of white poster board to the wall and let it curve down onto the table in a smooth arc; a roll of paper works for bigger products. The curve is what kills the hard horizon line behind the product.
Two things separate a clean white from a dull grey one:
- Light the background, not just the product. White paper photographs grey unless light actually reaches it. Give it its own bounce, or nudge the product forward so the window light spills onto the paper behind it.
- Accept that true paper-white usually needs one small edit. Even lit well, a phone often renders the background a touch grey. A small exposure lift on the background in editing is normal and expected, not cheating. Pushing it all the way to pure white in-camera tends to blow out the product's own edges, so light it bright, then finish it in the edit.
If the brief wants the product styled in a setting instead of on white, that's a different craft: see flat-lay photography tips for arranged overhead shots. Pure-white backgrounds matter most for marketplace and listing work, which the Amazon listings guide goes into.
The phone settings that hold a set together
Your phone has manual controls most creators never open. These are the ones that matter for product work.
- Clean the lens. A thumbprint you can't see adds haze and softens every frame. Wipe it before each shoot. Free, and it fixes more "blurry" photos than any setting.
- Clean the product too. Dust, fingerprints, and lint look far bigger in a close-up than they do in your hand, and dark or glossy surfaces show every speck. Wipe the product, steam a wrinkled garment, pick off the lint before you shoot, not in editing.
- Lock exposure and focus. Tap and hold on the product until the phone locks AE/AF, so reframing doesn't change the brightness. On iPhone you'll see "AE/AF LOCK" at the top; on Android it varies, so test yours. Lock once and fifty frames match instead of flickering through twenty brightness levels.
- Shoot at full resolution and never digital-zoom. Pinching to zoom just crops into the sensor and throws away detail. Move your feet instead, and frame a little loose (more on why in a moment).
- Turn HDR off. HDR blends exposures for landscapes; on products it can over-process edges and add a faint halo. Control the exposure yourself.
- Mind the light, not the ISO. In dim light a phone cranks its ISO to compensate, and high ISO means grain, worst in the shadows.4 Brightening a too-dark photo later only amplifies that grain, so add light rather than rescue it after. As rough guides in a manual app: keep ISO under about 800, and your shutter no slower than about 1/125 handheld.
- Shoot RAW if your phone offers it. ProRAW on iPhone or RAW mode on Android captures far more information, which lets you correct white balance after the fact without the image falling apart.5 It's the safety net for the shot you can't reshoot.
- Steady the phone. Sharp beats shaky every time. A ten-dollar tripod, or even the phone propped on a stack of books and fired with the self-timer, removes the small shake that softens handheld shots.
- Check portrait mode's edges. That background blur can make a product pop, but the algorithm sometimes blurs into the product's own outline. Check the edges on every frame; if it's eating the product, switch to normal mode and separate the product from the background with light instead.
The trick that makes a set look like one shoot
Brands rarely order a single photo. They order a set, and they notice instantly when shot three is warmer or brighter than shot one. The fix is the simplest move in this whole guide: once your light, tripod, and settings are dialed in, rotate the product, not the camera. Leave the phone locked on its tripod and turn the item to get your different angles. Every frame keeps the same light, distance, and exposure, so the set hangs together and your editing afterward is minimal. Shoot the whole set in one sitting under one unchanging light; a reshoot done days later under different weather almost never matches.
Match the light to what you're shooting
The same window setup flatters most things, but a few categories want a tweak, and a few actively fight your phone.
- Beauty and skincare: soft, diffused light (an overcast window, or a panel through paper) keeps packaging and shade accurate, which is the whole game in beauty. For creams and scrubs, side light shows the texture, and a close macro shot of that texture is one of the types of content skincare brands ask for most.
- Food and beverage: side light or a slight back light makes food look appetizing, where flat front light makes it look like a cafeteria tray. Move fast, because ice melts and steam dies. The food and beverage tip sheet goes deeper on plating and pour shots.
Then the hard cases, the ones that get rejected most:
- Shiny and reflective (glass, jewelry, watches, chrome, glossy packaging): your enemy is the reflection of you, your phone, and the room sitting right on the surface. Move the light until the glare bounces away from the lens, and for small reflective items, surround them with white card or a translucent box (your t-shirt diffuser, scaled up) so they mirror clean white instead of your living room. For jewelry, a small focused source like the LED panel, moved slowly until a single glint catches, beats flooding it with light.
- See-through (perfume, serums, clear drinks): back light is your friend. Put the product between you and the window, let the light glow through it, then lock exposure on the product so the window can blow to white behind it.
- Dark and matte (black gear, dark packaging): these drink light, and their edges vanish into a dark background. Give them a stronger source and a reflector on both sides to keep the outline crisp, and shoot them against a background a few shades lighter than the product.
Shoot to the brief, then deliver it clean
Every guide tells you how to shoot. Almost none tell you how to know you're done, or how to hand the work over so it survives the trip to the brand. This is the part that turns a good shot into an approved one.
Read the brief like a checklist
Before you shoot, turn the brief into a short list: how many finals, which angles, what aspect ratio (a vertical 9:16 for stories, 4:5 for feed, 1:1 for a listing), plain white or styled, which feature or label has to be legible, and any "don'ts." If the brief is vague, ask two or three quick questions up front rather than guessing; one short message beats a full reshoot. Frame a little loose, too, so the brand can crop one frame to a square, a vertical, and a wide without losing the product off the edge, and leave a little empty space if they'll drop text over it.
Run the 60-second approval check
On a proper screen, not the tiny camera preview, run each photo past this before you send it:
- Color is true. Check your white-card test frame first (the card reads neutral), then hold the actual product to the screen and confirm the brand color matches what's in your hand. Your screen catches obvious drift better than subtle shifts, so lean on the card. This triggers the most reshoots, so check it first.
- Highlights aren't blown. No pure-white patches where detail should be, especially on glossy or metallic surfaces.
- No reflection of you. You, your phone, and the window aren't mirrored in the product.
- Sharp where it counts. Zoom to 100%. The product is crisp and the label is readable.
- Clean, not grainy. No noise crawling through the shadows.
- The set matches. Across the batch, light, angle, and crop are consistent, so they read as one shoot.
- It follows the brief. Right count, orientation, background, and framing.
A shot that fails one line is faster to redo now, with your rig still set up, than after a rejection.
Send it so the color survives
This is the quiet step that undoes good work. Export as JPEG in the sRGB color space, the standard for anything viewed online, so the color you set is the color the brand sees on their screen.6 If your iPhone saves photos as HEIC, switch the camera to Most Compatible so it captures JPEG that anyone can open.7 And send the actual files through a transfer link or shared folder, not pasted into a chat app or sent as a screenshot, both of which recompress the image and can quietly shift the color you worked so hard to get right. Send them at full resolution while you're at it, so the brand has room to crop for an ad or a print without the file falling apart.
Lighting cheat sheet by scenario
Save this for your next shoot.
| Scenario | Light & direction | Background | Reflector | Key setting |
|---|---|---|---|---|
| Product on white (daytime) | Window, side or 45° | White sweep, lit | Yes, shadow side | AE lock, grid on |
| Lifestyle / in use | Window, natural, from the side | The setting itself | Optional | Exposure nudged up |
| Beauty close-up | Diffused window or panel through paper | Plain or soft prop | Yes, close in | AE lock, check portrait edges |
| Clear bottle / liquid | Window, back light | Bright, blown to white | Optional, in front | Lock exposure on product |
| Shiny / jewelry | Small panel, angled off-axis | Plain, non-reflective | White card surround | AE lock, full-zoom check |
| Dark / matte product | Stronger source, from the side | A few shades lighter | Both sides | Add light, HDR off |
| Evening, no window | One or two LED panels at 45° | Whatever the brief wants | Foam core between panels | AE lock, ISO low |
FAQ
Do I really need an expensive phone?
No. Any phone from the last few years with a decent camera shoots brand-quality product photos. Lighting and color accuracy decide the result far more than megapixels or how many lenses are on the back. The creator with the older phone and the better window wins.
Can I use a ring light for product photography?
For face-to-camera content, yes. For products, not really. A ring light's small, central source leaves a tell-tale circular reflection on anything glossy and doesn't spread evenly across an object. A flat LED panel in the $20 to $30 range lights products far better.
What's the best time of day to shoot?
Mid-morning and mid-afternoon, and overcast days anytime. You want bright but indirect light. Avoid direct midday sun, which throws hard shadows, and golden hour, which shifts product colors warm and triggers reshoots.
How do I send photos so the colors don't change?
Export as JPEG in sRGB, and if your iPhone saves HEIC, switch the camera to Most Compatible. Send the files through a transfer link or shared folder, not pasted into a chat app or as a screenshot, since those recompress the image and can shift its color.
Should I edit my product photos?
Lightly. Adjust brightness, contrast, and white balance, then straighten and crop. Don't crank saturation, don't drop on a preset that shifts the product's color, and don't try to rescue color you never captured. If the brief names an editing style, follow it exactly.
Clean light is the cheapest edge you've got
Lighting is the one advantage in this business you can build today, for nothing, and most creators never bother. That's your opening. A handful of clean, color-true product shots tell a brand more than any pitch, because they answer the only question a brand is really nervous about: will you deliver something they can use without a back-and-forth.
So build the window rig, shoot five products you already own, and run every frame through the approval check. Once you've got a few you're proud of, they become the start of your portfolio, and knowing what to charge and where to find the work is how a few good photos turn into steady bookings.
Footnotes
-
Adobe, "Diffused light photography: The beauty of soft light," on what makes light soft: "the closer a light source is to your subject, the softer it becomes," and the aim to "make the largest softbox I can to get the softest light possible." https://www.adobe.com/creativecloud/photography/technique/diffused-light.html ↩
-
Nikon, "The beginner's guide to White Balance": white balance "adjusts the colour temperature of your photo so that white objects appear white and all other colours appear realistic," with daylight around 5500K, cloudy around 6000K, shade around 7000K, and tungsten around 3200K; Nikon also advises you "try not to mix light sources such as tungsten and sunlight." https://www.nikon.co.uk/en_GB/learn-and-explore/magazine/tips-and-tricks/the-beginners-guide-to-white-balance ↩ ↩2
-
Apple, "Adjust the brightness and color temperature on your iPhone or iPad": True Tone "uses advanced sensors to adjust the color and intensity of your display to match the ambient light," and Night Shift "adjusts the colors of your display to the warmer end of the spectrum." https://support.apple.com/en-us/109351 ↩
-
Adobe, "The lowdown on using high ISO settings in photography" (2023): "the higher the ISO, the more noise you will likely see in your images. In extreme cases, it can significantly detract from a picture's overall quality." https://blog.adobe.com/en/publish/2023/04/20/lowdown-using-high-iso-settings-in-photography ↩
-
Apple, "About Apple ProRAW": ProRAW "combines the information of a standard RAW format along with iPhone image processing, which gives you more flexibility when editing the exposure, color, and white balance in your photo." https://support.apple.com/en-us/119916 ↩
-
Adobe, "Color settings in Photoshop": "sRGB is recommended when you prepare images for the web because it defines the color space of the standard monitor used to view images on the web." https://helpx.adobe.com/photoshop/using/color-settings.html ↩
-
Apple, "Using HEIF or HEVC media on Apple devices": choosing the camera's "Most Compatible" setting means "All new photos and videos will now use JPEG or H.264 format" instead of the space-saving HEIF/HEVC. https://support.apple.com/en-us/116944 ↩
For Creators
Put your color-true product shots in front of brands
No followers, no experience, no studio. Set your own rates and let brands come to you.
Create your free profile