Flat Lay Photography Tips That Get You Booked.
The flat lay brands pay for is the opposite of the pretty feed shot. Shoot, style, and deliver an approved set on your phone, no studio needed.
Search "flat lay photography tips" and you'll get a hundred guides on styling a dreamy overhead shot for your own feed: props trailing out of frame, the hero product tucked off to one side, the whole thing arranged to look effortless. Almost none of them describe the flat lay a brand will actually pay you to take.
That one is a different photo with different rules. A feed flat lay is about mood. A paid flat lay is about the product, because the brand has to sell it. Once you see the gap between the two, flat lay stops being a styling trick and becomes one of the most bookable skills a smartphone creator can offer.
This is a guide to the second kind: the overhead product shot that lands on a listing, runs in an ad, and gets you reordered. No studio, no professional camera, no followers required.
What brands actually book a flat lay for
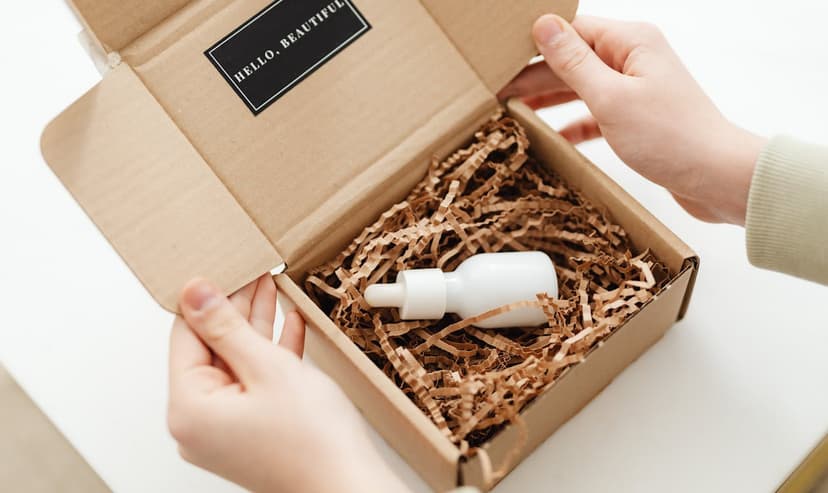
A flat lay is just objects arranged on a surface and photographed straight down. Brands order it constantly because it is the cleanest way to show a product: e-commerce listings, Amazon and Shopify pages, Instagram grids, ad creative, email headers, gift guides. One well-shot overhead can be cropped a dozen ways for a dozen placements, which makes it some of the most efficient content a brand can buy.
The demand spans niches: skincare, food, supplements, tech, fashion, candles, and lifestyle, for both products and services. And brands ordering UGC aren't buying it to look like a stock catalog. An AI image tool can generate a synthetic flat lay, but it can't photograph the actual product in an authentic setting, and that is exactly what a brand pays a person for. That preference isn't sentimental. A 2024 survey found that nearly all consumers (99.9%) seek out the photos and videos made by people who've actually used a product before they buy, and nearly half do so every time, up from 37% in 2021.1 Brands need a steady supply of that content, and flat lay is one of the most reorderable content types on the list.
So the skill pays. The trick is shooting the version that gets approved instead of the version that gets sent back.
Start with the brief, not the props
Here is what separates paid work from hobby flat lays before you've touched the camera: you shoot what the brand asked for, not what looks nice to you. That means reading the brief like a shot list.
A product flat-lay brief usually tells you most of this:
- Background. Plain white seamless or a styled lifestyle surface. These are different deliverables, not interchangeable. White is for listings and conversion, where the product has to float clean. Styled is for social and ads, where it needs to blend into a feed. If the brief doesn't say, ask before you shoot.
- Aspect ratios. Which crops they need, and for where. The common UGC set is 9:16 (Stories, TikTok), 4:5 (Meta feed), and 1:1 (square). These crop out of one another fairly easily. A wide 16:9 banner does not, it's a different framing you have to plan for up front.
- Shot count. How many angles or variations per product. A brand rarely wants one photo. They want a usable set.
- The product itself. Label facing forward and legible, current packaging, nothing damaged or expired.
- Reference images. If they sent examples, those are the target. Match the spacing, the surface tone, the prop level. Matching a reference is the single fastest way to get a first order approved.
If the brief is thin, send two or three specific questions before you start. A two-minute message beats a reshoot, and brands read it as professionalism, not nuisance.
Set up an overhead shot worth paying for
You need three things: a surface, soft light, and a way to hold your phone flat above it. None of it is expensive.
Prep the product first. This is the step beginners skip and brands notice. Wipe fingerprints off glossy bottles, lint-roll fabric, steam out wrinkles, peel factory film and price stickers, blow off dust. A phone camera shooting straight down exposes every speck. Two minutes of cleaning saves an hour of retouching, and some flaws can't be retouched out at all.
Pick the surface the brief points to. Match the background, not your taste. A few that cover most niches for under $15 total: peel-and-stick marble contact paper (bright, clean, beauty and skincare), a wood board (warm, food and candles), white posterboard (the simplest neutral), and a piece of linen or muslin (soft texture for lifestyle). Build a small stack of three or four and you can handle almost any product.
Light it soft, from one side. A window is the best light source you own, and it's free. Set up next to a north or east-facing window for soft, even light, and shoot on an overcast day if you can, since cloud cover diffuses the sun for you. If one side of the product falls into shadow, prop a sheet of white posterboard or foil-on-cardboard opposite the window to bounce light back in. Decide whether the brief wants shadow at all: listing shots usually want a near-shadowless, even look, while lifestyle shots can use a soft directional shadow for depth. Either is fine on purpose, neither is fine by accident. For the full lighting playbook, see these smartphone lighting tips.
Watch your own shadow. The signature overhead-phone mistake is leaning over the setup and blocking the very light you're using. Keep the window on the side you are not reaching across, and trigger the shutter with the volume button, a timer, or a cheap Bluetooth remote so your hand isn't hovering in the frame when the photo fires.
Get the phone flat and steady. It needs to sit directly above the surface and parallel to it. Tip it even slightly and the far edge of the product looks smaller than the near edge, the perspective skew that screams amateur. A phone tripod with an overhead arm ($15 to $30) is the easy fix; a stack of books at the table edge with the phone balanced on top works for free. Turn on the camera grid to keep everything square, and a small tripod and a few surfaces are most of the gear you'll ever need.
Compose for use, not for the feed
This is where most flat-lay advice will actively cost you a brand order. The editorial rules, off-center hero, rule of thirds, lots of props, "tell a story," are tuned to win on Instagram. Paid product composition is closer to the opposite.
Picture a candle two ways. The feed version: candle off to the left on a third line, a sprig of eucalyptus trailing out of frame, a linen napkin bunched in the corner, shot a touch from the side so you catch the rim. The version a brand approves: candle near-centered, lid and label squared to the camera and fully readable, one small prop at most, lit so the wax color reads true, shot dead flat so the jar isn't leaning. The first sells a mood. The second sells the candle.
A few rules that keep you on the paid side:
- Center and feature the hero. For a clean product shot, put the product in the middle and make it unmistakably the subject. Off-center styling is for lifestyle frames, and only when the brief asks for it.
- Keep the label legible and forward. If a viewer can't read the product in the hero shot, the shot has failed at its one job.
- Cut the props back. One or two supporting items, maximum, and only ones that help the product make sense. When everything competes for attention, nothing wins. Restraint reads as professional; clutter reads as hobby.
- Leave room for words. Brands drop headlines and prices onto these images. A little clean negative space where copy can sit makes your shot far more usable than one packed corner to corner.
- For a full product line, line the items up with even spacing and equal label legibility across every unit. Knolling, arranging objects squared to clean 90-degree angles, is the reliable way to make a multi-product flat lay look deliberate.
- Avoid the phone-lens trap. Shoot on your main 1x lens, never the 0.5x ultra-wide, which bows straight edges at the corners. If the product looks too small, move the whole phone closer or lower the rig, don't switch to the wide lens.
Style to what the product needs
Different niches have different conventions, but the paid-work rule holds across all of them: style for what the buyer needs to see, not for a prop showcase.
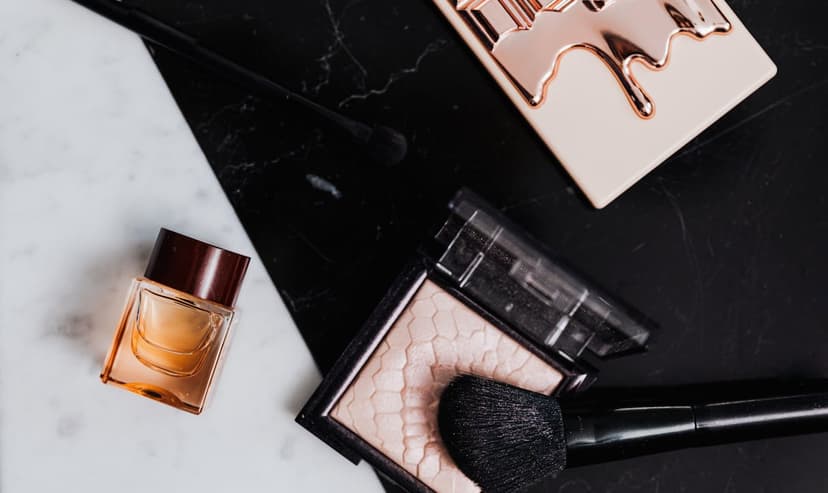
- Beauty and skincare. Arrange by routine order (cleanser, serum, moisturizer) on marble or white. Keep props to a cotton pad, a single stem, or a few water droplets, and make sure at least one frame shows the label fully forward, since the buyer is reading the ingredients.
- Food and supplements. Scatter a few key ingredients near the product, berries, nuts, a sprig, on a warm wood surface that makes food look appetizing. Work fast before anything wilts, and keep the pack and any on-label claims readable through the styling. The food and beverage UGC playbook goes deep on plating and the sub-niches that reorder.
- Fashion and soft goods. The hardest to shoot flat, because fabric goes lifeless. Steam out every wrinkle, then tuck pieces of foamboard or tissue inside the garment and pin a few deliberate folds so it reads as a product, not laundry. Shoot it, then retouch the pins out.
- Tech and gadgets. Go minimal: clean lines, lots of space, a neatly coiled cable at most. Let the product design carry the frame, and keep the logo or model name visible if the brand sells on specs.
Two cross-cutting hard cases worth knowing. Glossy or metallic packaging reflects everything, including you. Bounce light off a white card rather than aiming it straight at the surface, and shift around until your phone and hands disappear from the shine. A white product on a white background needs a faint shadow or a whisper of gray gradient to separate the two, or the edges vanish. For more on which items behave on camera, see products that photograph beautifully.
Deliver a set, not a shot
Here's the part hobby guides skip entirely, and the actual reason flat lay gets booked: a brand isn't paying for one pretty photo. They're paying for a consistent set they can use everywhere. Flat lay's whole advantage over lifestyle shooting is reliability, so a set that isn't internally consistent fails at the one thing it was hired to do.
The workflow that produces a clean set:
- Lock one setup and batch it. Same light, same height, same surface. Shoot the hero, then the variations, then the close-ups, all before you change anything. That's what makes the set match.
- Lock focus and exposure. Tap and hold on the product to set AE/AF lock so the phone doesn't re-meter and shift brightness between frames.
- Turn off the smart stuff. Disable auto-HDR and Live Photos. They process each frame a little differently, which quietly breaks consistency across a set.
- Hold white balance steady. Pick one setting and keep it for the whole shoot. White balance drifting shot to shot is one of the most common reasons a set looks off.
- Shoot wide, crop later. Frame with extra room around the edges so one capture gives you 9:16, 4:5, and 1:1 without reshooting. Skip digital zoom; crop in afterward.
- Edit to a recipe. Make one good edit, save it as a preset, and apply it across the set so every image matches. Keep it honest: a small exposure lift and a true white balance, not heavy filters. Over-edited UGC reads as fake, which is the opposite of why you were hired. Free apps like Snapseed or Lightroom Mobile do all of this.
- Deliver files brands can open. Phones default to HEIC, which some brands can't use. Export JPG unless they ask otherwise.
Because a set is multiple usable images from one session, it's also a single deliverable you can price as one. The UGC pricing guide covers what flat-lay sets tend to go for.
Before you send anything, run a thirty-second pass:
- Did you hit every shot and ratio the brief named?
- Do all the images share the same white balance and brightness?
- Is the product centered (or aligned) and the label readable?
- Any dust, lint, fingerprints, or stray threads you missed?
- Is the shot truly flat, with no leaning or skew?
- Are the shadows intentional, not harsh accidents?
- Is the edit honest, not oversaturated or over-sharpened?
- Is the hero sharp when you zoom in?
One thing sent back can cost you the reorder. The check costs thirty seconds.
Build a flat-lay portfolio before you have a brief
You don't need a brand deal to start. Pick three to five products you already own across different niches, a skincare bottle, a coffee bag, a candle, a pair of sneakers, a phone case, and shoot a full set for each using everything above. Those mock samples show a brand exactly what you can do.
When you build the portfolio, prove the things brands are buying:
- A few strong sets across different product niches and surfaces.
- Clean, consistent lighting and editing within each set.
- A clear, legible hero in every arrangement.
- A consistent look across the images in a set, not just one standout.
Flat lay is also one of the strongest faceless UGC formats there is. No face, no voice, just your hands and the product, and these faceless UGC examples show what a hireable set looks like. If being on camera isn't for you, this is a complete content specialty you can build without ever appearing in frame. In a single afternoon you can shoot five or more sets with different products and backgrounds, which is enough to fill a profile.
That profile is what does the work. On a marketplace like Modliflex, you don't cold-pitch anyone: brands browse creator profiles and come to you, so a portfolio of clean, consistent flat-lay sets is what gets you found and booked. If you're starting from zero, here's how to build a UGC portfolio that lands brand deals.
Flat lay photography FAQ
How do I improve my flat lay product photography? Shoot truly overhead, light it soft from one side, center the product, cut the props back, and deliver a consistent set instead of one photo. Most "bad" flat lays fail on a tilted angle, harsh shadow, or clutter, fix those three and you're most of the way there.
What gear do I actually need to shoot flat lays on a phone? A window, a surface, and a way to hold your phone level above it. Posterboard and marble contact paper cost a few dollars; a phone tripod with an overhead arm is the one upgrade worth making. You don't need a dedicated camera.
White background or styled background? The brief decides. White seamless is for listings and conversion; a styled surface is for social and ad content. If the brief doesn't specify, ask, don't guess and reshoot.
How many shots is a "set"? It depends on the brief, but a typical set is one clean hero plus a few angles and crops from the same setup, delivered in the aspect ratios they asked for. Shooting wide lets you pull several ratios from one capture.
Can you really get paid for flat lays shot on a phone? Yes. Brands buying UGC specifically want authentic, human-shot content of their product, and flat lay is one of the most reorderable forms of it. A clean phone-shot set that hits the brief beats a fancier shot that misses it.
Shoot the version that gets booked
The craft of a flat lay isn't hard to learn. Camera flat, light soft, product clean and centered, props quiet, set consistent, that's most of it, and you can practice it tonight on the kitchen table with things you already own.
The mindset shift is the part that pays. Stop shooting for what looks good on your feed and start shooting for what a brand can drop straight onto a listing or an ad. Do that consistently, deliver a tidy set that hits the brief the first time, and flat lay quietly becomes one of the most dependable skills in your kit.
Footnotes
-
PowerReviews (a 1WorldSync company), "The 2024 Role and Impact of User-Generated Visual Content on Shopper Behavior," based on a survey of 15,870 US consumers fielded December 2023. The report found that 99.9% of consumers seek out photos and videos from other customers before a purchase, with nearly half (48.5%) doing so every time, up from 37% in 2021. https://www.powerreviews.com/research/ugc-visual-content-shopper-behavior-survey/consumers-growing-reliance-on-visual-content/ ↩
For Creators
Get booked for the shots you can already take
No followers, no experience, no studio. Set your own rates and let brands come to you.
Create your free profile